Color calibration and color checker cards might seem complicated, but they're simpler and less critical than you might think. Getting your color balance right matters, but obsessing over every swatch can often become more trouble than it's worth.
Coming to you from Karl Taylor with Visual Education, this straightforward video looks at the process of color calibration cards. Taylor emphasizes the value of protection since these cards become useless once fingerprints or fading occur. He also compares it to simpler alternatives like the mini swatch card and gray cards, which might be enough for casual use. The main takeaway here is that while these tools are useful, the detailed calibration process they're often associated with isn't usually necessary for typical photography.
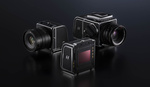
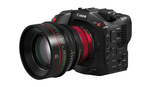
Taylor argues convincingly that constant recalibration to achieve perfect color accuracy can be a waste of time for most scenarios. Cameras from trusted manufacturers like Hasselblad, Canon, or Nikon already come with accurate and scientifically precise color profiles. He stresses the point that when shooting scenes with multiple light sources, absolute accuracy becomes nearly impossible due to minor color variations between lights. The complexity of mixed lighting makes rigid calibration not only impractical but usually pointless since most photographers extensively edit their images anyway.
Yet, there's a scenario where precise calibration does matter: photographing artwork or archival projects. Taylor shares his personal experience photographing paintings for a museum, explaining that exact color reproduction was essential. Only in those controlled, flat-field situations does rigorous calibration really justify the effort. For typical product or portrait photography, he recommends focusing instead on neutralizing unwanted color casts using simpler gray cards.
What makes Taylor’s advice helpful is his practical demonstration of the neutralization process. Using software tools like Capture One or Lightroom, he shows you how to quickly neutralize images with a simple click, ensuring color consistency. The process itself is straightforward, but Taylor also candidly reveals that even slight shifts in card positioning or lighting angles can alter readings, underscoring the limitations of overly precise calibration.
Another valuable insight he shares involves lighting modifiers—like softboxes, umbrellas, or reflectors—which each subtly alter color temperature. He explains that while these differences exist, they typically fall beneath human perceptibility, further reducing the need for obsessive calibration in typical commercial or creative settings. Taylor's point is clear: knowing when precision matters—and when it doesn't—is essential for practical, efficient photography.
Taylor wraps up his demonstration by briefly showing advanced calibration settings used specifically in archival or reproduction photography. This final section hints at more complex calibration workflows but leaves the specifics for the viewer to explore in the full video.
Check out the video above for the full rundown from Taylor.


Something vert dear to me BUT not so bothersome as one will think. I have had a number of monitors through the many years of digital photography, Like about every three years you need a new computer due to hardware updates and hard drive/soft drive, motherboards etc. and then new SW as well as newer photo programs come and go. As far as monitors and since monitor calibration programs go images of a calibrated monitor and life long (like 25 years) image colors are on par when looking back! The next somewhat problem is the color scale sRGB or Adobe RGB percentage or DCI-P3 Color Space.
I have a BEN Q monitor as well using not the same BEN Q calibrator but a datacolor Spyder X2 Elite and every month recalibration reminder and a day bright single small light in the room. I enjoy the most.
Not a pro but hobbyist! One thing that really upsets me is all the photographers say on YouTube never use the profiles that Adobe painfully recreates for each camera, example say you are doing Astro Milky Way image on a beach in landscape view Portrait gets the beach and sky most accurate not the way you saw it because the human eye can not colors at night only a camera can and that is why most all MW photos are dimed down with grey or black skies, people just say Photoshoped right off.
Ever been to the Grand Canyon at sunset/rise or even at noon when ever colors change drastically and post cards will be blueish but your camera today will tell a different story. The one thing I use when the landscape has all the colors of a crayon box is the Datacolor Spyder Cube, takes a little learning, but say you are in a cave with many different lights (not to bright also) and want to get all the colors you see in each light but also the right exposure - the Datacolor Spyder Cube will help. Ever been to the inside of a Antebellum home with the many different type of lights and colors of each - a grey card will not get the exposure correct and colors of lamps and their decorations colors are a must to capture to be believed and with outdoor light coming through a window also changing things.
The one thing not even Adobe show you how to use the color picker, I once saw a on a video that for the proper pick should be all in the 30's, do not really know, but for night astro on a beach with some surf I pick the white water surf. but again exposure brightness. Again what about fall colors are you bright sun or a cloudy day (the best time) use AWB or use a calibrated C1.
One that will trip your tiger is sunset or sunrise with boats in the foreground that are white or even a winter snow scene - A first with the A7RM5 is a selection of white balance auto: white or ambience or standard - White is great for boats and snow (my find)
Want to blow your mind the photographer for NASA in the film days
https://clarkvision.com/articles/color.of.the.night.sky/
Bottom line is YOU for you are the Artist. I wear glasses and a coating I get lets be see the icons on the monitor at different depths or walking through a book store and at the magazine section all covers are a deep looking 3D all covers and photos inside, hard to explain.
1. can you see the depth?
2. the many colors of the night sky as well a the buoy lights
3. the real grey scale is the reflected light of the sun on the surface of the grey surface of the moon.
4. What makes the yin and yang colors of the different half's of Pegasus magenta and a blueish color different that the whole of the sky and have you ever captured sky glow the colors of gases high up in the atmosphere where atoms are vibrating.